How to Set Up a Smart Bird Feeder Camera
Most setup problems with a smart bird feeder camera trace back to one of three things: a weak or wrong-band Wi-Fi signal, a solar panel that is not actually catching direct sun, or an SD card that was never formatted for the device. The Birdbuddy Pro and similar solar smart feeders walk through pairing in an app, but getting the physical setup right first saves most of the troubleshooting.

How do you set up a smart bird feeder camera step by step?
- Mount the feeder where the solar panel faces the sun for most of the day, ideally with a clear view of open sky rather than under dense branches.
- Format the SD card in the feeder itself, or in a computer using the file system the manual specifies, before inserting it.
- Power on the feeder and open its companion app to begin pairing, usually over Bluetooth first.
- Join the feeder to your home Wi-Fi network, choosing the 2.4 GHz band unless the manual states the model supports 5 GHz.
- Fill the feeder with seed, then check the live view or a test alert to confirm the camera is capturing images before you walk away.
Give a new smart feeder a few days before judging whether birds are using it, since any unfamiliar object placed in a yard, camera or not, takes time for local birds to accept as part of the landscape. A feeder swapped into a spot birds already visit regularly tends to get discovered faster than one placed in a brand-new location.
Why won't my smart feeder camera connect to Wi-Fi?
The most common cause is band mismatch. Most smart bird feeder cameras only join 2.4 GHz networks, since that band carries a signal farther through walls and yard distance than 5 GHz, even though 5 GHz is faster up close. If your home router broadcasts a single combined network name, check your router settings for a separate 2.4 GHz network name to connect to, or check whether your specific feeder model supports 5 GHz, as a small number of newer models do.
The second common cause is distance and obstruction. A feeder at the far edge of the yard, behind a wall, fence, or the house itself, can sit outside reliable Wi-Fi range even on 2.4 GHz. A Wi-Fi extender or mesh node aimed at the feeding area solves this without moving the router. If reliable Wi-Fi at the ideal feeder spot is simply not realistic in your yard, it is worth comparing that spot against a second-best location that does have signal, since a camera feeder with a dropped connection is far less useful than one placed a little further from the "perfect" placement but solidly on the network.
A router firmware update or a full router restart occasionally clears a pairing issue that looks like a feeder problem but is actually a stale network handshake. Try this before assuming the feeder hardware itself is at fault, especially if other smart home devices on the same network have also been acting up recently.
How do you install and format the SD card?
- Buy a card in the capacity and speed class the manual lists as supported. Check the current plan and specs in the manual rather than assuming a larger card always works.
- Insert the card into the feeder's card slot with the feeder powered off, then power on.
- Use the in-app or on-device option to format the card the first time it is used in that feeder, which sets up the file structure the camera expects.
- Periodically check stored footage through the app, since local storage fills up and older clips may be overwritten automatically.
Why is my smart bird feeder camera not charging?
Cold weather slows the charging rate of the battery inside most smart feeders and can prevent a full charge from a small solar panel on short winter days. Battery chemistry in general accepts a charge more slowly in cold temperatures, so a feeder that charged fine in warm months may lag behind in winter even with a clean, well-aimed panel. Wipe the solar panel clean of dust, pollen, and frost, and confirm nothing, like a nearby branch that grew in over the season, is now shading it during peak sun hours.
Gear for this job
Prices move constantly; the button shows the current figure.


Which way should the solar panel and camera face?
Aim the solar panel toward the direction that gets the most direct sun through the day, which in the northern hemisphere generally means south-facing with a clear view of open sky. Avoid mounting under a dense tree canopy even if the spot otherwise looks ideal for placement.
Point the camera lens itself away from facing directly into the sun. A camera aimed east or west can catch harsh backlight at sunrise or sunset that washes out the image, so a north-facing or shaded-approach angle for the lens, even while the panel faces south, often gives cleaner photos.
Can a smart bird feeder camera work without an internet connection?
Some models save photos and video locally to the SD card and can operate without a live Wi-Fi connection, giving you a card you review later on a computer. Others depend on the app connection for live view and instant alerts and are far less useful offline. Check the specific model's listing for local recording support if a reliable Wi-Fi signal at the feeder location is not realistic in your yard, and consider a model built around 5 GHz or no-subscription local storage for that use case. See the roundup of no-subscription bird feeder cameras for models built specifically around local SD storage instead of an ongoing app subscription.
Subscription terms and what features sit behind a paid tier change fairly often across these brands, so check the current plan on the manufacturer's own product page or app store listing before buying based on a feature you saw mentioned elsewhere, rather than assuming it will still be free or included by the time your feeder arrives.
How close should the feeding perch be for sharp photos?
Keep the perch at the distance the manufacturer's manual specifies as the camera's designed focus range, usually close to the lens by design. Moving a bird further from the lens than that range softens focus, since these cameras are built around a fixed close-up distance rather than a zoom lens that can refocus on the fly. Do not modify or extend the feeding tray or perch beyond the feeder's original design, since that is the single easiest way to accidentally push birds outside the fixed focus range and end up with consistently blurry captures.
Battery life and how quickly the solar panel recharges it in different seasons is its own topic worth planning around separately, since a feeder that runs low on charge during a run of overcast days simply stops recording until the sun returns. The smart feeder battery calculator estimates roughly how many clear days of charge a given panel size and battery capacity should provide.
Comparing a few setup approaches by budget
| Model | Good for | Wi-Fi |
|---|---|---|
| Birdbuddy Pro | All-around setup with AI bird ID | 2.4 GHz |
| Birdfy 2 Pro | Dual-lens wide and close-up views | 2.4 GHz |
| NETVUE by Birdfy, Value for Beginners | Lower-cost first smart feeder | 2.4 GHz |
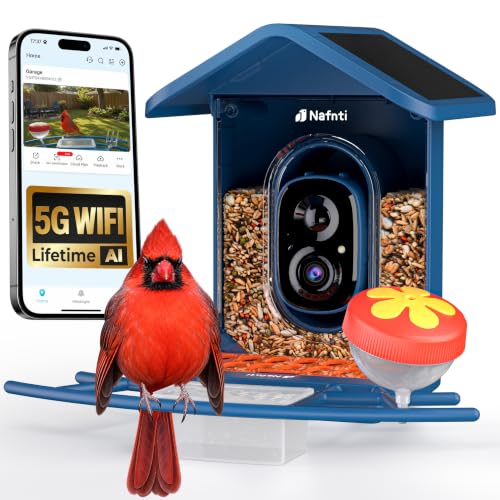
| Nafnti Smart Bird Feeder Camera | Homes with weak 2.4 GHz coverage | 5 GHz |
Birdbuddy Pro and Birdfy 2 Pro are the two most-compared flagship models in this category, and the setup steps above apply to both in roughly the same order, even though their apps look different. See the Bird Buddy versus Birdfy comparison and the best solar bird feeder cameras roundup if you have not settled on a model yet, since solar panel size and placement flexibility vary more between these brands than the basic setup steps do.
What you need
Prices move constantly; the button shows the current figure.

Get the printable checklist
One page with every item, the placement distances and the cleaning schedule. We send it once. No sales sequence.
Used only to send the checklist.Frequently asked questions
How do I set up a bird feeder camera?
Mount it where the solar panel gets direct sun most of the day, format the SD card in the size and format the manual specifies, then pair the feeder to your phone app, usually over Bluetooth first and then onto your home Wi-Fi. Fill the feeder and confirm a live image or test alert comes through before considering setup complete. Most issues trace back to Wi-Fi band or panel placement rather than the feeder itself.
Why won't my smart bird feeder camera connect to my phone?
Check that you are joining a 2.4 GHz Wi-Fi network, since most models cannot join 5 GHz networks unless the manual specifically says otherwise. Also confirm the feeder is within reliable Wi-Fi range of your router, since yard distance and walls weaken a signal quickly. A Wi-Fi extender aimed at the feeding area often resolves a connection that keeps dropping.
Why is my smart bird feeder camera not charging in winter?
Cold temperatures slow how quickly a battery accepts charge, and shorter winter daylight gives a small solar panel less total sun exposure even on clear days. Clean the panel of dust or frost and confirm nothing new is shading it, such as a branch that grew in since spring. Some charge loss in cold weather is normal and expected even with a clean, well-aimed panel.
How do I install an SD card in a bird feeder camera?
Power the feeder off, insert a card of the capacity and format the manual lists as supported, then power on and use the app or on-device menu to format the card for first use. Check the current manual for the maximum supported capacity rather than assuming a larger or faster card always works, since some feeders only recognize specific formats or sizes.
Which direction should a smart bird feeder camera face?
Face the solar panel toward the direction that gets the most direct sun through the day, generally south-facing in the northern hemisphere with a clear view of open sky. Point the camera lens itself away from facing directly into the rising or setting sun, since strong backlight washes out photos. A shaded approach angle for the lens with a sun-facing panel usually gives the cleanest images.